Showing posts with label iPhone 4. Show all posts

Tuesday, 8 April 2014

// // 1 comment

Solved – Nokia Certificate Not in Phone and SIM Error

nokia-certificate-crror

Recently i seen the issue in my friend mobile handset its (Nokia), after flash the mobile he is not able to install any application it cause occur  " Certificate not in Phone and Sim"

Sometimes while updating the phone or when you’re just completely out of luck, your Nokia phone may not install any new applications because it has lost all its certificates which are used to install signed applications to the phone and allot them proper permissions depending on how much can they be trusted.

People keep asking me for help regarding this same question again and again. So I’m publishing a solution here to help anyone who faces a No Valid Certificate or Certificate not on phone or SIM error on his Nokia S40 phone (even other phones can get the certificates through this method. Just give it a try.

Procedure to re-install Nokia certificates

All you need to do is to open the certificates in the phone’s default browser. Opera Mini or Nokia Browser will NOT work. I’ve uploaded the certificates onto the server here, so it is just a few easy steps for you.

Compose a new SMS in your phone.
Write http://bit.ly/NokiaCertificate as the content.
Now either save this SMS as draft or send it to your own number so that you can access its content in the message viewer.
In the message viewer, select the link and open it (tap on it in case of touch phones).
From the page that opens (http://resources.techmesto.com/NokiaCertificates/), keep clicking on the various certificates and Install them.
The certificates will be installed and available for approving signed apps.
To confirm, you can Go to Settings> Security> Authority Certificates

Alternative Way:

If you have access to entering the web address in your default browser (web), you can just skip the first 4 steps and instead manually enter the address http://resources.techmesto.com/NokiaCertificates/ in your browser’s Go To Address column and install certificates from the page that opens.
Read More

Wednesday, 24 October 2012

// // 3 comments

Omantel & Nawras Manual Handset Configuration of iPhone, Android & Blackberry

The New Generation phone are required the manual configuration like a iPhone, Android & Blackberry handsets, the manual setting of these mobiles are very easy follow the mention below instruction and get it.

iPhone Manual Configuration 


Omantel 

Internet settings (iPhone – Oman Mobile)
Goto Setting >>Network>>Data Calluler Network
Data Name : Oman Mobile
APN : taif
User Name : taif
Password : taif


Nawras 


Internet settings (iPhone – Nawras )
Goto Setting >>Network>>Data Calluler Network
Data Name : isp.nawras.com.om
APN : 
User Name : test
Password : test

Android Handset Manual Configuration 


Omantel 
Internet settings (Android – Oman Mobile)
Goto Setting >>Wireless Network>>Mobile Network >>APN
Data Name : Oman Mobile
APN : taif
User Name : taif
Password : taif
APN Type : Internet
Nawras 

Internet settings (Android – Nawras)
Goto Setting >>Wireless Network>>Mobile Network >>APN
Data Name : Oman Mobile
APN : taif
User Name : taif
Password : taif
APN Type : Internet

BlackBerry Handset Manual Configuration 

Omantel 

Internet settings (Blackberry – Oman Mobile)
Goto Option>>Advance>TCPAPN
Data Name : Oman Mobile
APN : taif
User Name : taif
Password : taif


Nawras 

Internet settings (Android – Nawras)
Goto Option >>Advance>TCPAPN
Data Name : isp.nawras.com.om
User Name : test
Password : test

Read More

Tuesday, 23 October 2012

// // Leave a Comment

How to Setup iTune WiFi Sync


Tired of tethering to iTunes and wondering how to set up iTunes Wi-Fi sync? It works just like traditional USB sync but without the cable! (Sync phone over WiFi without cable) that is, you still need to be plugged into a power cable -- baby steps! You can also see How sync Music from itune to phone. Here's how to get it going:
  • Make sure your iPhone, iPad or iPod touch is connected to your Wi-Fi network and running iOS 5. (Here's how to update to iOS 5), itune WiFi sync iOS 5 and above version. 


  • Make sure the PC running iTunes is connected to the same Wi-Fi network and is running iTunes version 10.5


  • Plug in the device you want to setup Wi-Fi sync with
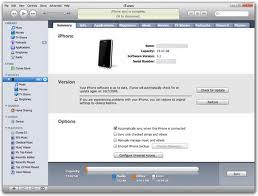
  • When its been recognized, click on it in the left column then select Summary in the header bar


  • Scroll down until you see the option for Sync with this iPhone over Wi-Fi
  • Click the box to turn it on
  • Hit Apply

That's it, now as long as iTunes is open on your PC, as soon as you plug your iPhone, iPod touch, or iPad into the power outlet, it should appear in iTunes and sync over Wi-Fi.
(Yes -- It has to be plugged in to the power for this to work, so you are really just cutting the cord to the PC not to the wall!)
If you want to initiate a sync manually, you can do this from your iOS device and you don't need to be plugged into a power outlet.
  • Go to Settings
  • General

  • Click on iTunes Wi-Fi Sync
  • Click on Sync Now


That is all there is too it, you can now sync your iPhone, iPod touch, or iPad without the cable. Well without a cable connected to your PC anyway!


Related Topic
Read More

Monday, 22 October 2012

// // 1 comment

How to Show Battery Percentage on iPhone 3GS, iPhone 4 and 4S


Since the iPhone 3GS, several nice, little features have been included. One of my favorites is the ability to show a percentage of the battery life in the upper right hand corner instead of just the battery graphic. Here is how to do it. Update: these settings can be found on any modern OS device now including iPhones, iPads, and iPod Touch devices.

More data is better, right?

Be sure that your device has been updated to one of the latest iOS versions. Then follow these steps to show your percent of device’s battery life.

1. Click Settings
2. Click General
3. Click Usage
4. Toggle Battery Percentage to ON


Read More
// // Leave a Comment

How to Increase Battery Life of your iPhone, iPad or iPod Touch


With each update of the operating system that powers Apple’s mobile devices, many users experience issues with decreased battery life. The increasing popularity of location based apps and iCloud syncing are partly to blame for the increased consumption. Increasing available of LTE increases battery usage as well. By changing some simple settings on your Apple device, you should be able to improve your battery life and charge less frequently.

By the way, if you are worried about your battery life, you will want to enable ShowBattery Percentageso you can more accurately measure your battery levels.

Do I have a battery problem?

Heavy internet, GPS, or gaming use will crush the battery on any device, but with minimal usage, any apple devices should easily make it through a day on one charge. At the end of the day your standby time should be much greater than your usage time. If the amount of time recorded for your standby time is much lower than you expect, that means your phone is using energy when you do not expect it.
You can check this through the following steps:

Settings -> General -> Usage

Do I need to recalibrate my battery?

LIthium ion batteries like Apple products use usually do not benefit from a “recalibration” by completely draining and full recharging the batteries. In fact, doing this too frequently will decrease lithium battery life. Apple does recommend doing it at least once a month to keep the battery monitoring system working correctly. Most people with battery drain issues will be draining and recharging frequently already. Although easy enough, recalibration is almost never going to help.
Recommendations
  • Disable Sending of Diagnostic and Usage Data. When this is enabled, Apple receives information from the users to help tweak and fine tune future editions of the software. However, in some cases a badly performing app can repeatedly trigger crash reports. Some of these crash reports are unusually large as well. Sending this data over and over can drain a battery relatively quickly. As disabling this will cause the user no noticeable effects, this is the first thing I recommend. You can disable sending this data by doing the following:

          Setting -> General -> About -> Diagnostics & Usage -> Don’t Send
  • Disable Bluetooth / Wi-Fi. This one is obvious and is an old trick. If you never use bluetooth, you can save a nice junk of juice by disabling Bluetooth searching and connecting on your device. Likewise, if you are in an area where you know you are not going to be using wi-fi, you can temporarily turn it off. Although obvious, these hints are essential when using heavily dependent GPS tracking apps over long periods of time. Running and tracking apps are well known battery drainers through the heavy use of GPS; however, when you exercising or hiking, you are really unlikely to need bluetooth or wi-fi. In fact, if you don’t even want to receive calls during this time, just place it in airplane mode. Turning these unessential services off improves your chances of completing that 20 miler marathon prep with some battery still intact. The only downside is you have to remember to turn them back on when you return to civilization.

          Settings -> Wi-Fi
          Settings -> General -> Bluetooth
  • Disable Automatic Time Zone Determination. The way OS X determines your location and sets your time zone automatically is very clever. However, in certain circumstances this frequent use of the GPS can cause battery drain. By enabling this only when you travel, you remove a potential waste of battery.

          Settings -> Location Services -> System Services -> Setting Time Zone


  • Disable Useless Locations Services and Notifications. Each time your device uses the GPS to determine your location or wakes up your phone to deliver a notification, a tiny bit of battery is used. If you are using these excessively, those tiny bits add up. Review these areas and disable what you don’t need.

          Settings -> Location Services -> Select individual apps to disable
          Settings -> Notifications -> Select individual adds to remove from
          Notification Center

  • Decrease Screen Brightness. I like my screen as bright as the sun. Literally, I crank up the brightness as high as it will go and turn off Auto-Brightness. Powering that bright screen drains battery. If you can tolerate it, do not be like me and go ahead and decrease your brightness. You will definitely save battery.

          Settings -> Brightness

  • Disable Push Email. Apple has never been very robust in the enterprise environment. Many “pushable” email account connections are still not perfect. If you can tolerate not receiving your email instantaneously, changing your email to fetch will improve anybody’s battery. Fetching less frequently will use even less battery. If you have a troublesome email account, this may fix your battery issues altogether.

          Settings -> Mail, Contacts, Calendars -> Fetch New Data -> Push -> Off
          Settings -> Mail, Contacts, Calendars -> Fetch New Data -> Set Fetch Rate  
          to lowest  tolerable time.

  • Decrease or disable iCloud. Many people have reported that iCloud seems to have several bugs that decrease battery life. Since iCloud is a large component of iOS 5, I hesitate recommending that someone not use it. If you have a MobileMe account, continuing to use it until iCloud is more stable is one option. What I am currently recommending is just temporarily disabling it for a couple of days to see if the battery issues are related to it. If it doesn’t help, then just turn it back on. Decreasing what you sync over iCloud will help. Decreasing iCloud sync over cellular should improve battery life significantly too:

          Settings -> iCloud -> Documents & Data -> Use Cellular -> Off
  • Remove and replace email accounts. As noted above, poorly performing email accounts are the root of many users’ issues with battery life. These bugs are usually carried over from settings in iOS 4. Removing and then re-adding these email accounts should remove these issues. Of course, deleting and then replacing your email accounts is highly annoying. Make sure you have the prior settings written down (or that the information in iTunes is correct) before deleting them. Removing your accounts can be performed through the following command:

          Settings -> Mail, Contacts, Calendars -> Select Account -> Delete Account
  • Wipe and Reset. Nuking your phone and starting over is pretty painful; however, this frequently is the only true option that works. There seems to be a bug in systems restored from backup that causes massive battery drain. Make sure everything has been moved off your phone and you are well synced with iTunes. Wipe your phone and then setup the device from scratch on iTunes again without restoring from backup. The command to totally reset and wipe your device can be found at the following:

         Settings -> General -> Reset -> Erase All Contents and Settings

Selectively performing these tweaks will improve anybody’s battery life. If you are experiencing one of the bugs in iOS 5 that is crushing your battery life, these hints can save your sanity. Good luck. If you figure out anything else that helps, feel free to post it in the comments below.
Read More
// // Leave a Comment

How to Download Nokia Apps on your Computer

All we are trying to get the application on your computer or safe place because in future you don't want to download again in Ovi store or without internet facility we can to use these application. But Nokia Ovi store don't give you permission to download apps on computer and the option (Download via PC) always show hide. 

Then process of very simple to download application on your computer without using any software, for download the apps you have to registered on Ovi store, after that follow mention below instruction. 

  • Login in with your Ovi store 
  • Set you mobile in which one you are using 

  • Select or search the application.
  • After that open the application on new tab.
  • Go to the Application URL and edit the URL, After application Number add the /download and press Enter 

  • On your screen you will get the Application pop-up

  • Now Click Ok and save the file where you want to save.
Read More

Saturday, 20 October 2012

// // Leave a Comment

How to Change the Name of your iPhone,iPad or iPod Name


While purchase the new mobile or mistake you input the wrong name and now  you want to change your iPhone/iPad or iPod device name so there is two to change the device name.
  1. Using the iTune with your Computer
  2. Using your iPhone  

Using Computer

  • Connect your device and open iTunes.
  • In the source list (the left-hand column of iTunes), double-click the name of your device.
  • Type the new name for your device and press Return on the keyboard.

Sync the device (press Sync in the bottom right corner of the screen).

Using Mobile iOS

  • On your device, tap Settings > General > About.
  • Tap the first line, which should display the name of your device.


  • Rename your device using the on-screen keyboard and tap Done.


Read More

Wednesday, 17 October 2012

// // Leave a Comment

[Solved] Certificate Expired Error on Symbian Phone

If you use an Symbian S60 3rd edition based mobile phone (Nokia N-Series phones like N73, N95, N80, N91, N80 and E-Series phones use Symbian S60v3 as OS) you must have encountered the very common certificate errors like 'Certificate Expired' or 'Certificate Error. Contact Application Supplier' while installing themes or softwares on your phone.
The errors are caused because of the security measures introduced into the new version of Symbian Series 60 mobile operating system disallowing installation of old applications and invalid certificates, however bypassing this security feature and fixing these certificate errors to install themes and softwares is very easy, simply follow the instructions below:
  • Open you mobile main Menu.

  • Navigate to Settings -> General -> Date and time and Now change the year back one year.

  • Now install the application.(Don't forget to change date back to original)
  • If the above does not solve the problem Goto the Application Manager.

  • Click the Options  and select the Settings 

  • And set "Online Certificate check" = Off and Software Installation = All.


UPDATE: If you own an older phone you might receive the following error: "Installation security error. Unable to install" 

To solve this error and install application/Theme navigate to Tools -> Options -> Setting -> Software Installation and change setting to On.
Read More

Monday, 15 October 2012

// // Leave a Comment

How to Reset Android Phone on Factory Default Setting

Today the largest amount to Android phone are available in market as you know Samsung, Sonya...etc also adopt the Android OS, because this is the very fast and useful OS  more exciting Game, Chat facilities is there. 
There are many different reasons that a phone may need to have a factory reset performed. You may be experiencing too many issues with apps loading slowly, or malfunctioning when they finally do load. Or perhaps a friend or customer service person suggested the process to help with connection issues. Luckily, a factory reset doesn't actually involve sending your phone off to the factory, just these few steps that you can do at home:

In case you want to restore your Android based smartphone to the factory default settings, it is possible to perform a Factory data reset from within the Android operating system.

PRECAUTION

A Factory data reset will erase all your personal information, any contacts stored on your phone and any programs you installed. Therefore, we recommend making a backup of all data before starting the procedure. Please note that data stored on external memory cards will not be erased.

SOLUTION

Performing a Factory data reset:
  • Click the Menu button and tap Settings.

  • Tap Privacy and, in the Personal data section, select Factory data reset.
  • Tap Reset Phone and then Erase everything to confirm. If you want to remove all the
  • The smartphone will shut down and reboot, restoring factory default settings.
Read More
// // Leave a Comment

How to Remove Installed Application from Android Mobile


When you buy your new Android mobile you was installed lots of application, but now mostly application are not used, so you want ot ready to uninstalled the unwanted application from you mobiles. Apps you download from Google Play can be easily uninstalled from your phone or tablet, and if the app was purchased, you can always re-install at a later date.


If you've installed an app on your phone or tablet using Google Play that you no longer want, you can uninstall it by following these steps:
  • Navigate to your devices settings and press the icon to launch the setting application. While in the settings menu, you will see a listing of all the settings that you can change. Select the "Applications" listing to continue. 

  • After pressing the Applications menu from Settings, you will see a list of 5 choices. Press the "Manage applications" icon that will allow you to manage and remove your installed apps.

  • Once in the Manage applications sub menu, you will see a list of your installed applications. On the top of the screen, you will see four icons;Downloaded, which will list all the apps that you downloaded and installed; Running, which shows all currently running apps; All, that lists all the apps installed on your device; and On SD Card that lists any apps that you have installed on your SD card.


  • Press on the app listed that you want to delete. A screen will appear that will give some details about the app, including how much storage the app consumes, how much of information is stored in your cache file and any default launch settings.
  • Once you are certain that you have selected the correct app and that you want to delete it from your phone, press the "Unistall" button. This will begin to delete the app from your device. Once finished deleting, your screen will show that the app has been deleted. 


Note: if you don’t see the “Uninstall” button, or if you only see the option to “Uninstall updates,” then the app in question cannot be removed from your device. The app is likely a system app that cannot be uninstalled.
Read More

Friday, 31 August 2012

// // Leave a Comment

iPhone | How to take Backup and Restore

One of the most common (and obvious) recommendation before hacking the iPhone is to backup the iPhone so that if things go horribly wrong you can at least restore your iPhone to avoid losing any of your settings such as sound settings, widget settings, certain network settings, and other preferences and information such as text messages, notes, call history contact favorites etc.


The iPhone backup procedure is very simple and you don't want any other help if you read this blog.

  • First Download the iTune latest version and connect you iPhone.
  • When you connected iphone the iTune automatically open if not then you will manually open iTune and you will see in left side  "Device" option under the device you see your iphone,

  • Right click the device and right click and select "Backup"


  • Your iTune backup sync and backup complete in few minute. 
  • if you want to install or restore backup then use the "Restore from Backup" after restoreing the backup your iPhone is restart and your backup is restore.


Read More
// // Leave a Comment

iPhone4,4s | How to Install Jailbreak For Download a Free Apps


iPhone4,4s |  How to Install Jailbreak For Download a Free Apps


WARNING: Cracked applications are illegal. The whole premise behind cracked applications is if you would like to test an application before purchasing it from the Apple AppStore. It is expected that after you download cracked apps to your iPhone, iPod Touch or iPad running the iOS 5 firmwarethat you either delete the app after testing it or purchase it from the AppStore.

Earlier in the year we told you that AppSync was updated to support the iOS 5.0 firmware. With the released of the iOS 5.0.1 Untethered Jailbreak in the forms of RedSn0w 0.9.10b3, PwnageTool 5.0.1 and Corona 5.0.1 Untether numerous people were reporting errors with installing AppSync. If you experienced an error with installing AppSync, while being Jailbroken on the iOS 5.0.1 firmwarethen you will be glad to know that the latest version of RedSn0w has fixed errors with AppSync according a tweet by Apptrackr.
Thus, if you were experiencing errors while being Jailbroken on the iOS 5.0.1 firmware untethered, simply re-run RedSn0w o.9.10b3 over your existing Jailbreak (ensure you deselect the install Cydiaoption).

If you would like to install AppSync on the iOS 5.0.1 firmware to get cracked apps then you will need to install AppSync for iOS, which is only available through an external repository that must be added through Cydia. In this how to guide you will learn how to install cracked applications to your iPhone, iPod Touch or iPad running the iOS 5.0.1 firmware using Appsync and Installous.

Install iOS 5.0.1 Cracked Apps


  • The first thing you will need to do is Jailbreak your iPhone or iPod Touch running the iOS 5.0.1 firmware.
         Download Link :-

  • Extract the installed zip file and run Absinthe.exe you will get the Chronic-Dev Absinthe Version 2.0.4 windows , before click the jailbreak you can connect the your iPhone, after connect the iPhone click the "jailbreak" wait a minute, it will installed in your iPhone and after install in will restart automatic.


  • After restart the iPhone you can see the "Cydia" in your Application.


  • After you ensure you are Jailbroken you must launched Cydia, tap the Manage Tab, tap the Sources section and finally tap the Edit button in the top right hand corner of the screen.

  •  You should now see an Add Button appear in the top left corner of the screen. Tap  the Add button now and type in the following source:

http://cydia.hackulo.us/


          After typing the source above tap the Add Source button.
  • With the hackulous source now added into Cydia go into the hackulous source by tapping on it and you should see AppSync for iOS 5.0+. Install AppSync for iOS 5.0+ and then restart your iPhone, iPod Touch or iPad. After it has restart, launch Cydia again and install Installous for iOS 5.0.1 (Installous 4)  to your iDevice.


Congratulations! You have just installed AppSync and Installous to install cracked apps on the iOS 5.0.1 firmware. Additionally, you learned to fix AppSync errors on the iOS 5.0.1 firmware. If you have any further questions please leave them in the comments section below…
Note: iJailbreak.com does not support cracked applications. As it is our promise to report on everything to do with Jailbreaking, however, we have a responsibility to report on such news. If you followed this guide please keep in mind installing crack applications are illegal.

Read More